No products
 View larger
 By buying this product you can collect up to 25 loyalty points. Your cart will total 25 loyalty points that can be converted into a voucher of 0,75 €.
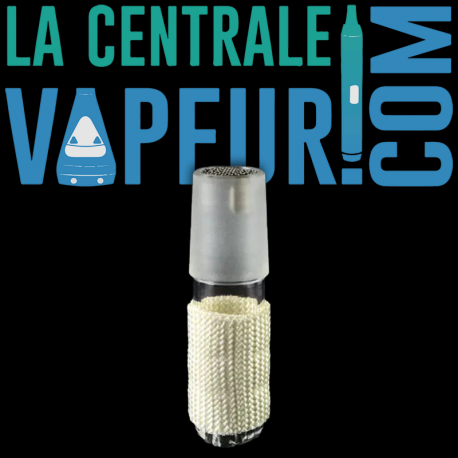
Extreme Q / V-Tower Glass Heater Cover
ARIZ_VTXQ_Heat
15,12 € tax incl.
New product
-20%
18,90 € tax incl.
Official glass element for vaporizer Arizer V-Tower and Arizer Extreme Q living room heaters
Features :
- Compatibility: Arizer V-Tower and Extreme Q
- User manual in English (adapted into French below)
Usage:
What you'll need:
- A flat surface
- A small dish / tray
- Philips screwdriver size #1
- Philips screwdriver size #2
- Protective gloves
- Safety goggles
- Bottle of compressed air (available at most electronics and computer stores)
Steps to follow :
- Unplug the power cord from the unit
- Remove/pull off the four rubber feet on the bottom of the base and carefully place in a small dish or tray
- Unscrew the four screws located under each rubber foot and carefully place in small dish or tray
- Remove/pull off the bottom base plate cover
- Unscrew the 6 screws that hold the center mold to the base and carefully place in small dish or tray
- Unplug the data (ribbon) cable leading to the front LCD panel connection
- Pull up to tlif the center mold out and squeeze/pull off the locking plug wire connector (wire connector that leads from the power input of the machine to the main circuit board) to disconnect. Once disconnected pull the center mold wich contains the glass heater cover straight up and out of the warming unit.
- Remove the stainless-steel tubular collar (pull straight up to remove) that surrounds the glass heater cover assembly.
- Locate the four screws (on the cradle mold) that locks the glass heater cover into place, remove all four screws and remove the cover and carefully place in small dish or tray
- Before removing the broken glass heater cover ensure you have your protective gloves and eyewear on
- Carefully remove the glass heater cover by pulling straight up and remove/clean out using compressed air unit
- Discard the old heater cover and old fabric insulation
- For easier installation, remove the screen from the top of the heater cover and place on top of the ceramic heating element
- Slide the new glass heater cover with fabric insulation over the ceramic heating element, the fabric insulation should be aligned so it is not exposed above the top of the cradle mold
- Make sure the screen inside the glass heater cover is sitting/touching on top of the ceramic heating element
- You will notice a locking nib on the base of the glass heater cover sticking out. Place this locking nib so it rests in the bottom molded section so it wi be held firmly in place.
- Ensure the lead wires from the heating element are secure in the grooves to prevent the wires from being pinched.
- Place the cradle mold cover back on/together and insert the four screws and tighten to secure the glass heater cover in place.
- Place the stainless-steel tubular collar back onto the mold
- Insert the center heater cover assembly partially inside the base of the unit and plug in the 2 cable/plugs Data (Ribbon) Cable and the locking wire plug connection to the base
- Tighten the 6 screws to secure the center mold to the baseof the machine
- Align the base cover with the four screws, you will notice a small indent on the base cover, this should align with the locking plug wire connector at the back of the unit.
- Once aligned screw and attach the rubber feet to the base.
 ⚠️ Glass is not covered by warranty, so we advise you to shake your package before signing for its reception and to sign with reservation if in doubt. In case of broken glass upon receipt, you have one hour to report it to us, otherwise no request can be accepted.
☎️ For any questions before or after purchase, our team of enthusiasts is at your disposal on our vape hotline at +33 1 83 64 69 26 from 11 am to 7:30 pm from Monday to Friday, and from 12:30 pm to 7:30 pm on Saturday. You can also place an order directly over the phone if you wish.
If you want to buy a vaporizer in Paris, our vaporizer shop is 500 meters from the République metro station, at 16 boulevard de Magenta, 75010 Paris.


